Create a Project
If you want to create a new project, the first thing you need to do is to click on the blue "+ New project" button on the top right corner of your "Projects" page.

Next step is choosing the type of project you want to annotate.
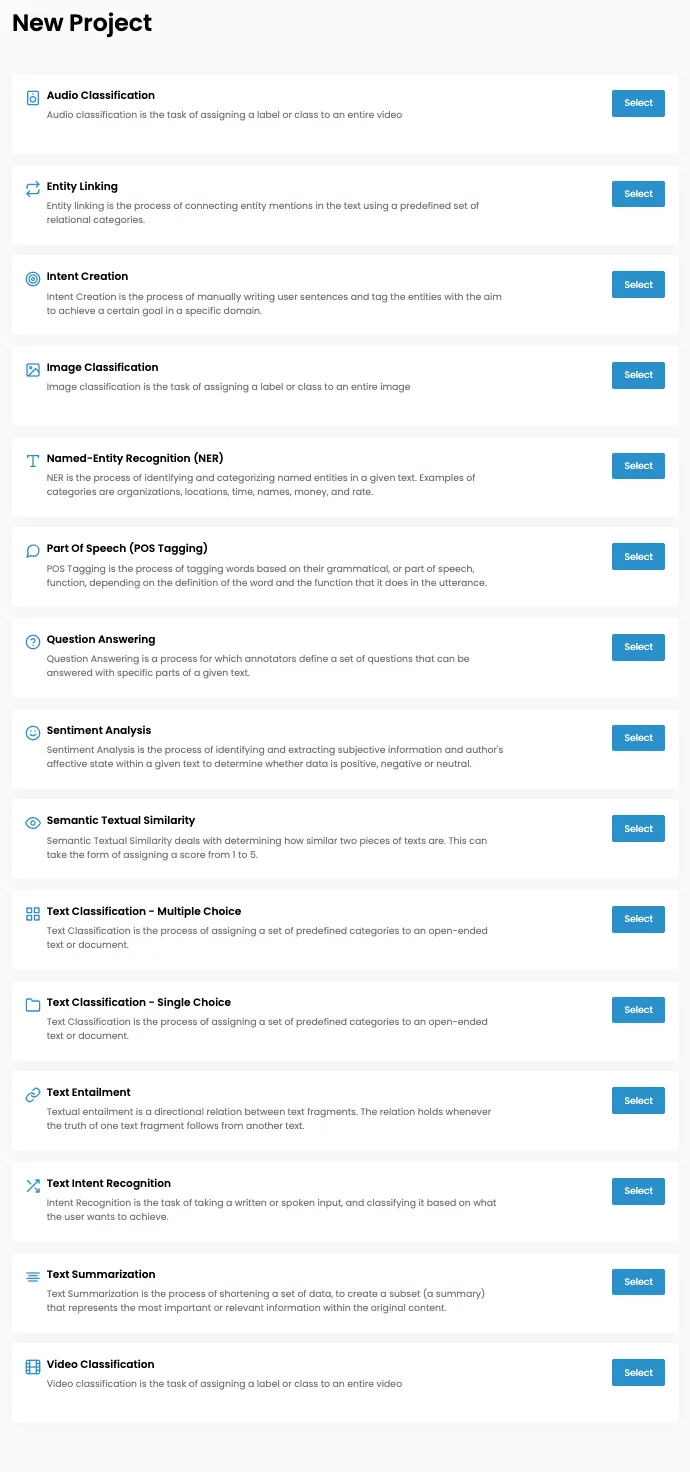
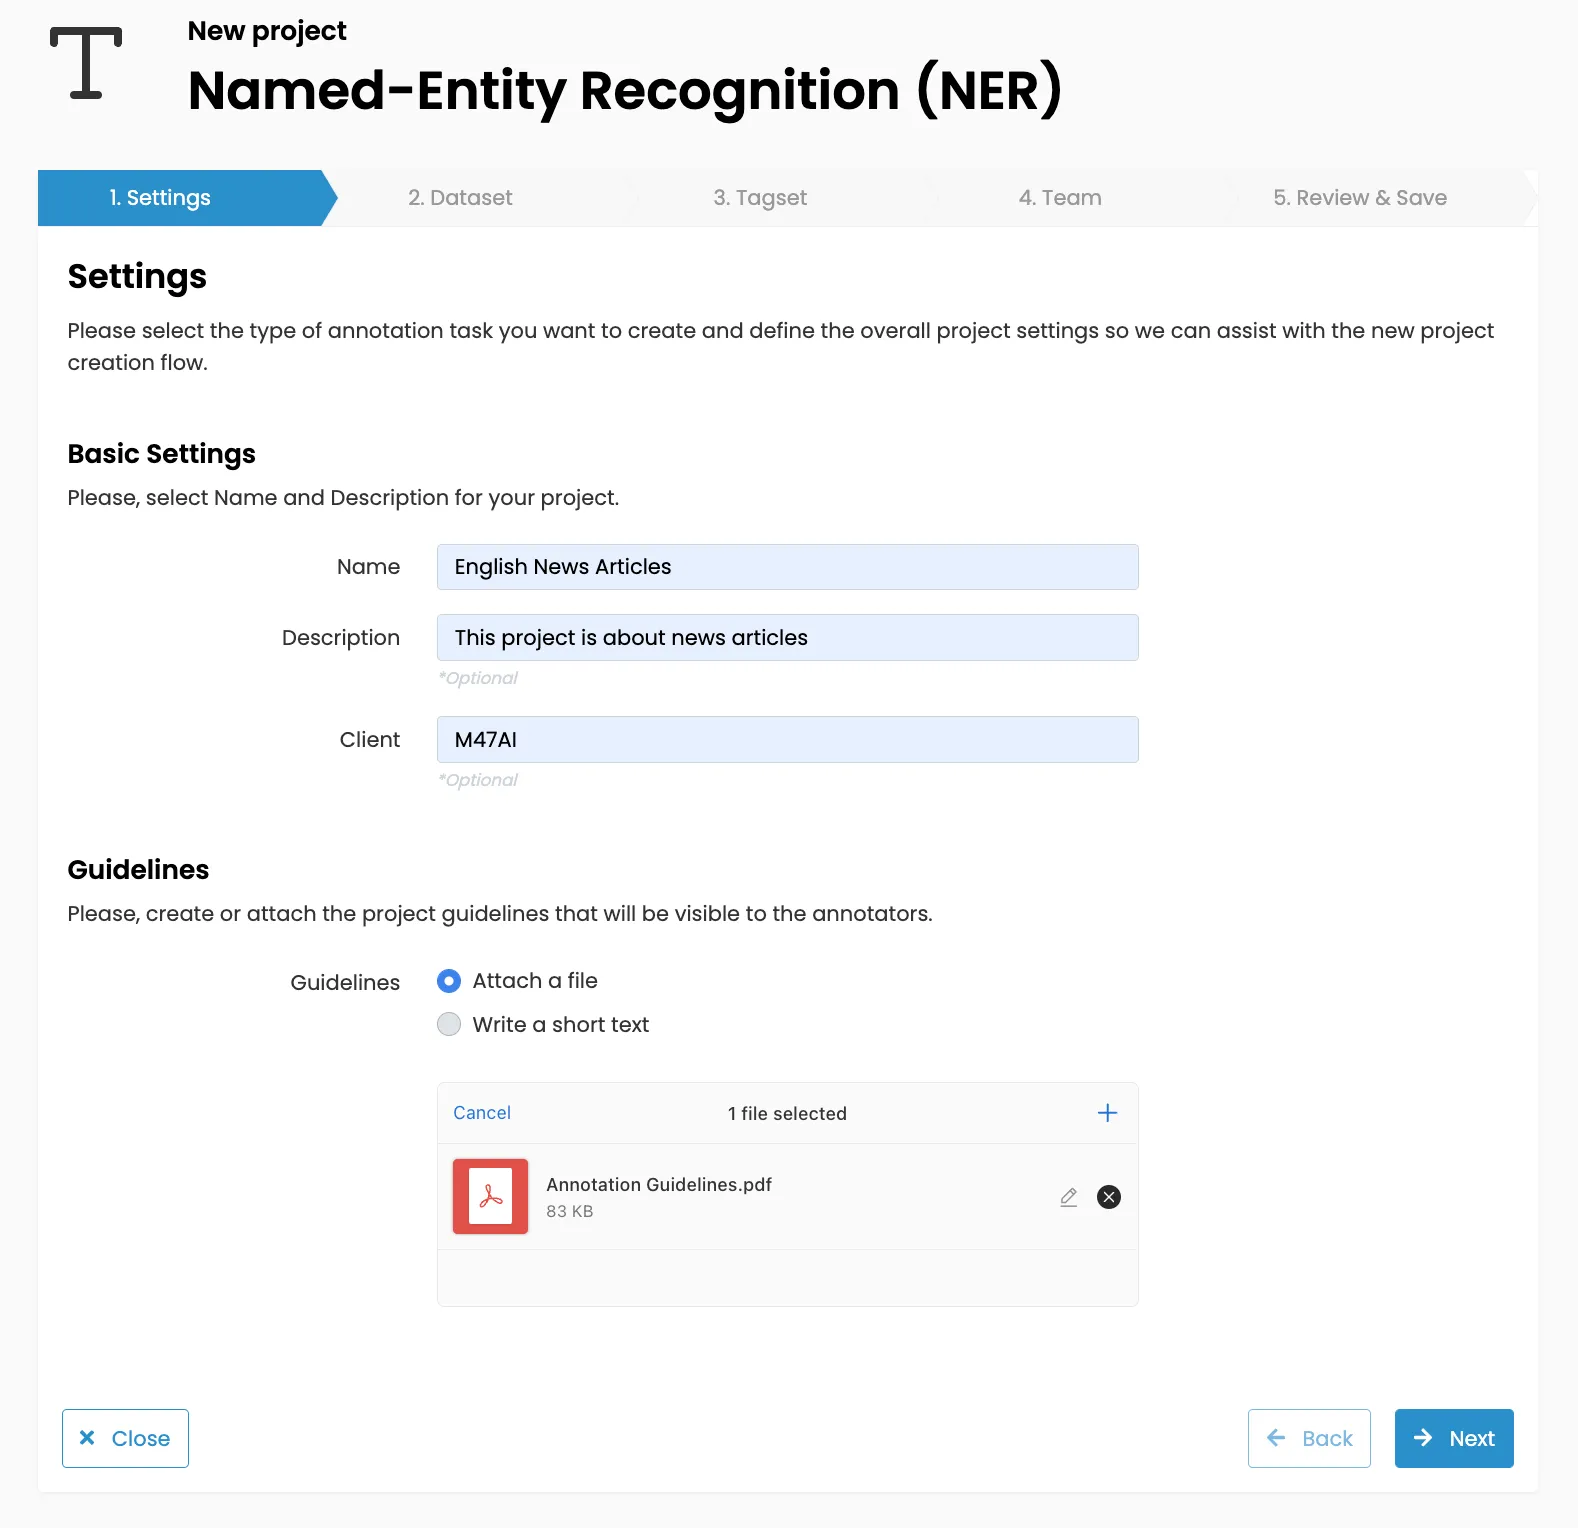
Once you've chosen it, follow these 5 steps:
1. Settings: define the overall project settings such as the name, description and client. You can also attach or write here project guidelines for your annotators.
2. Dataset: select a dataset from your library - you will have to upload it in advance to your library.
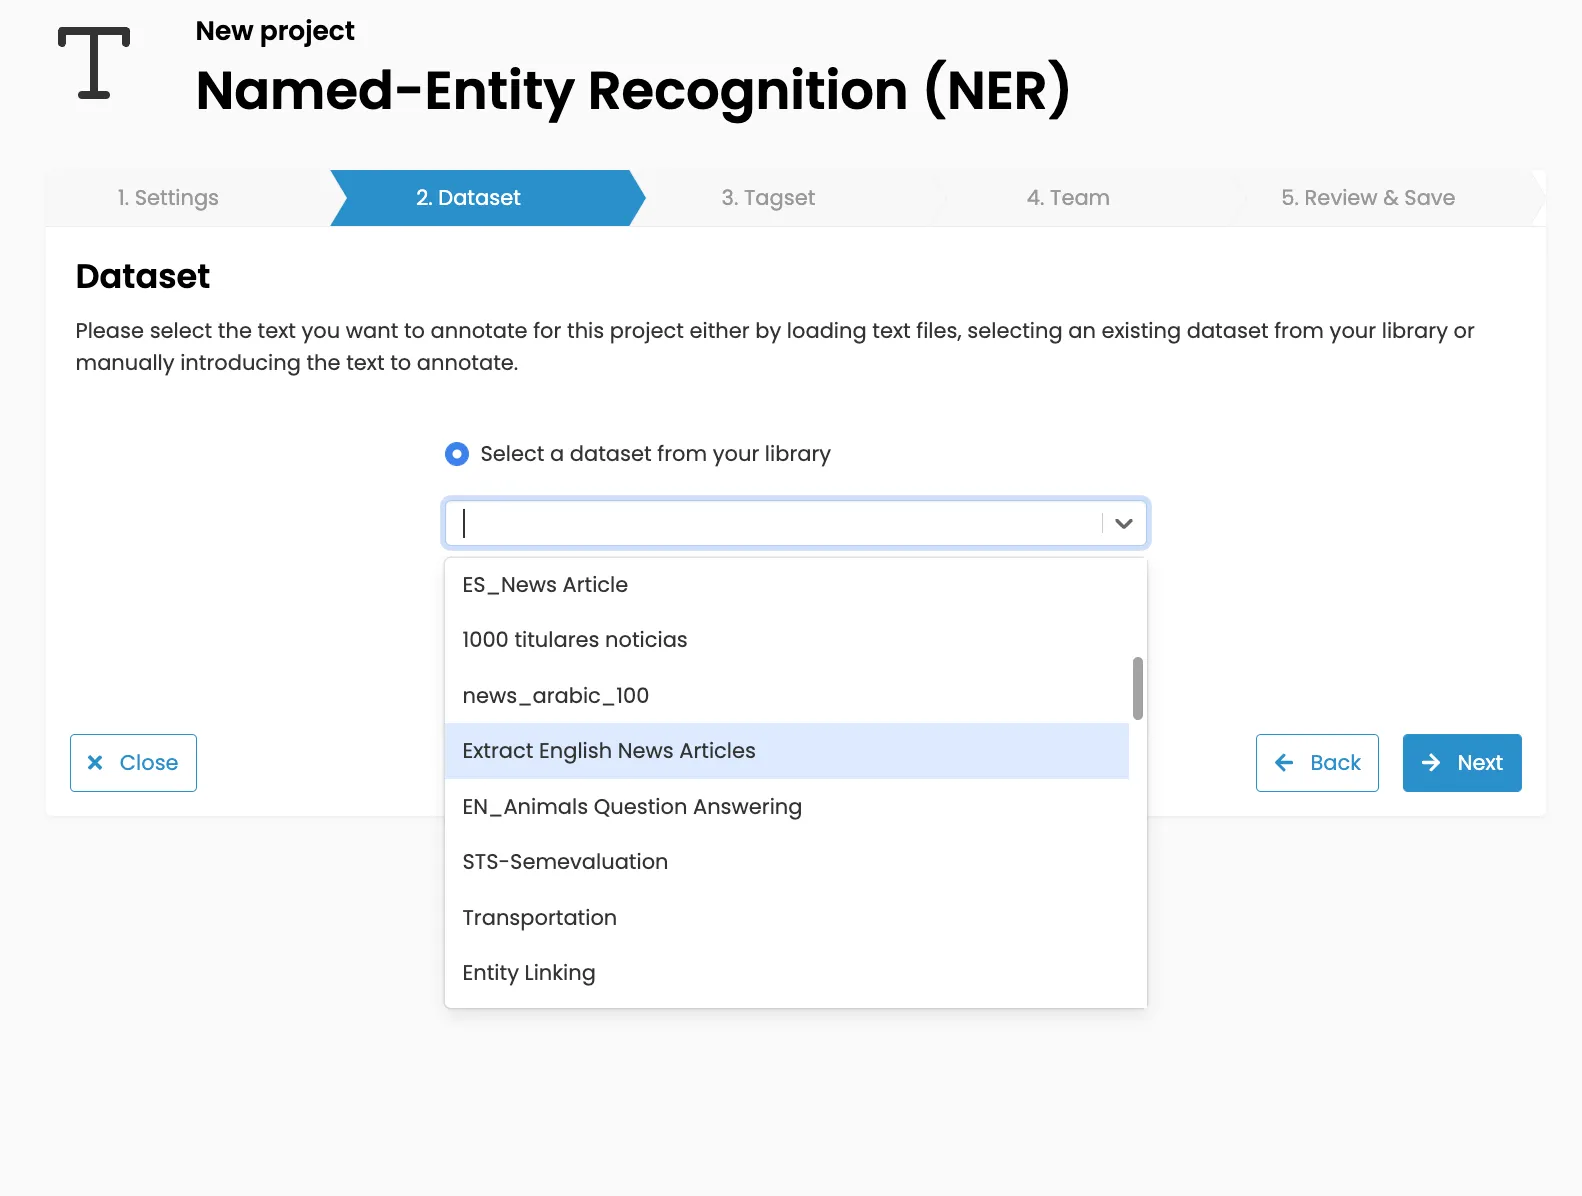
For further information about how to add a new dataset, go to "Datasets" > "Create a Dataset".
3. Tagset: select which tags you want to use to annotate your text by selecting an existing tagset from your library.
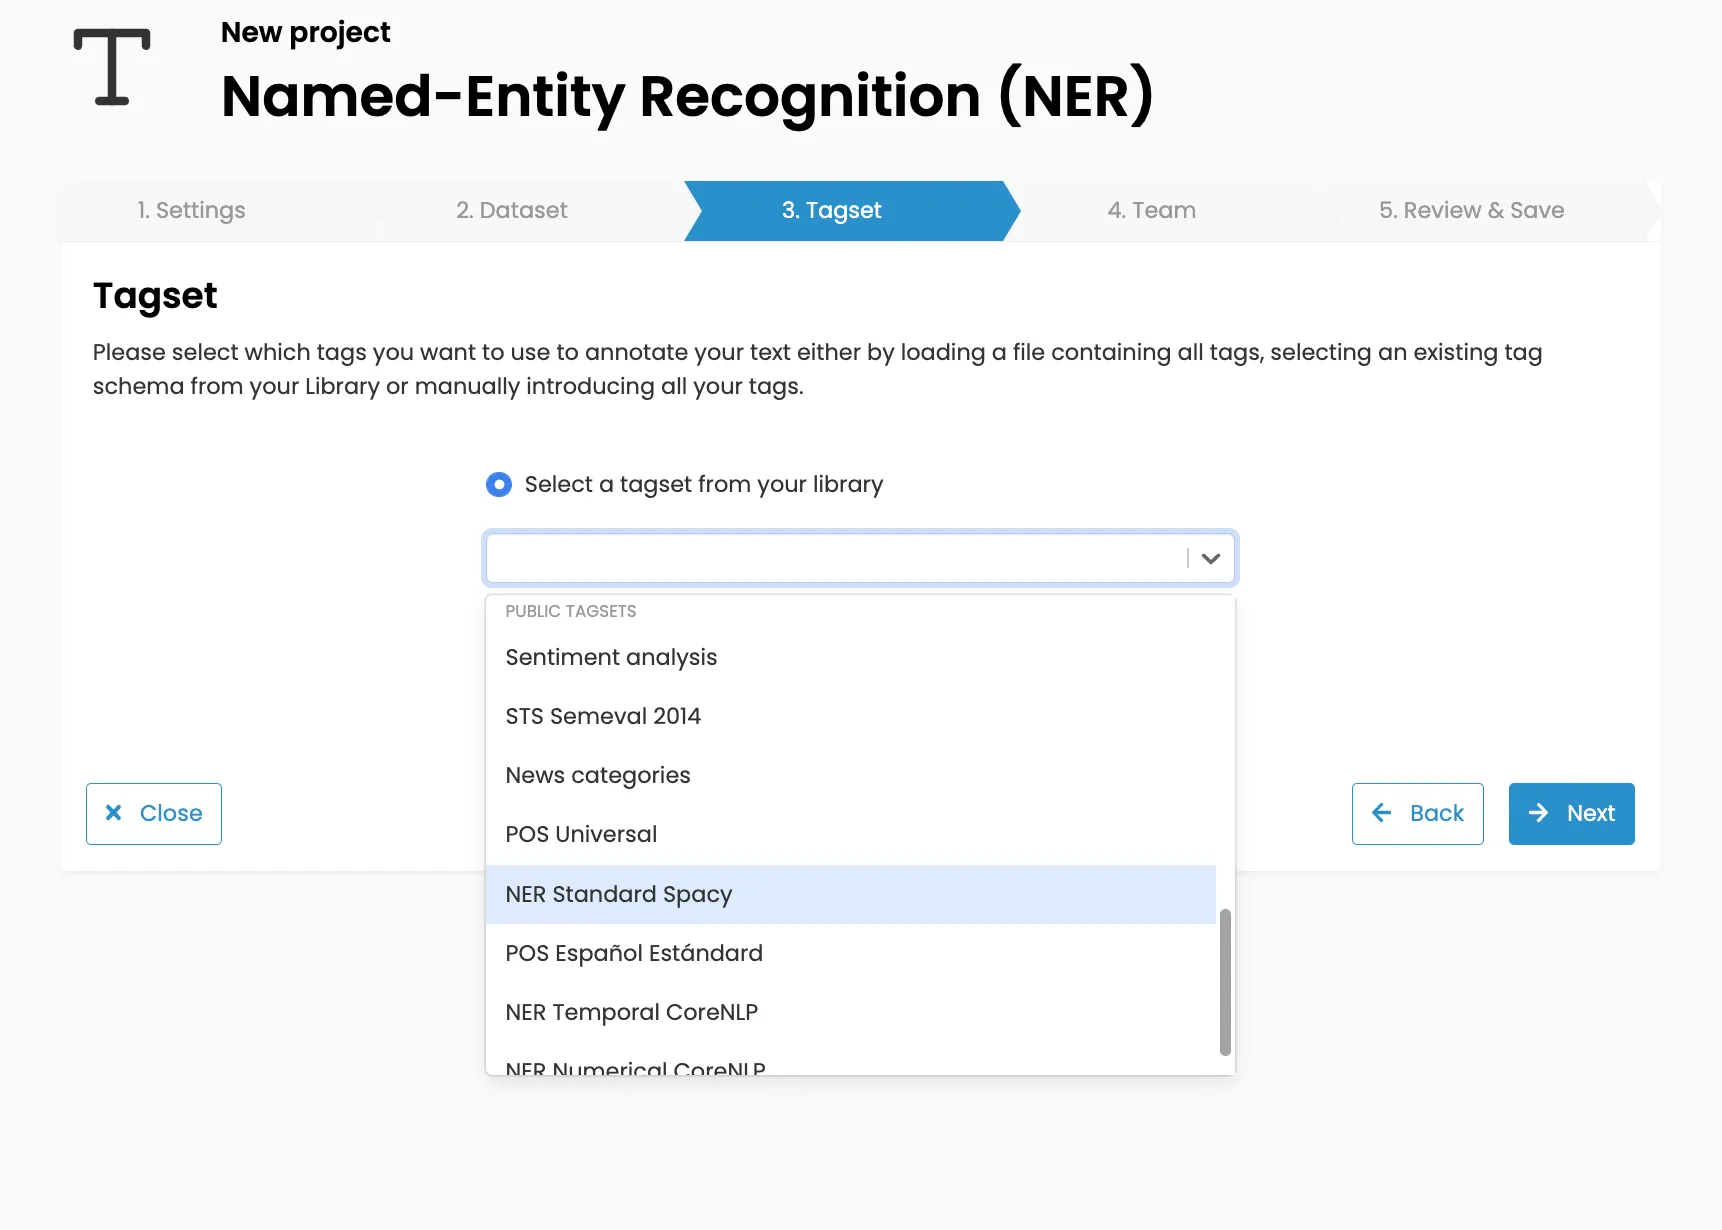
For further information about how to add a new tagset, go to "Create a Tagset".
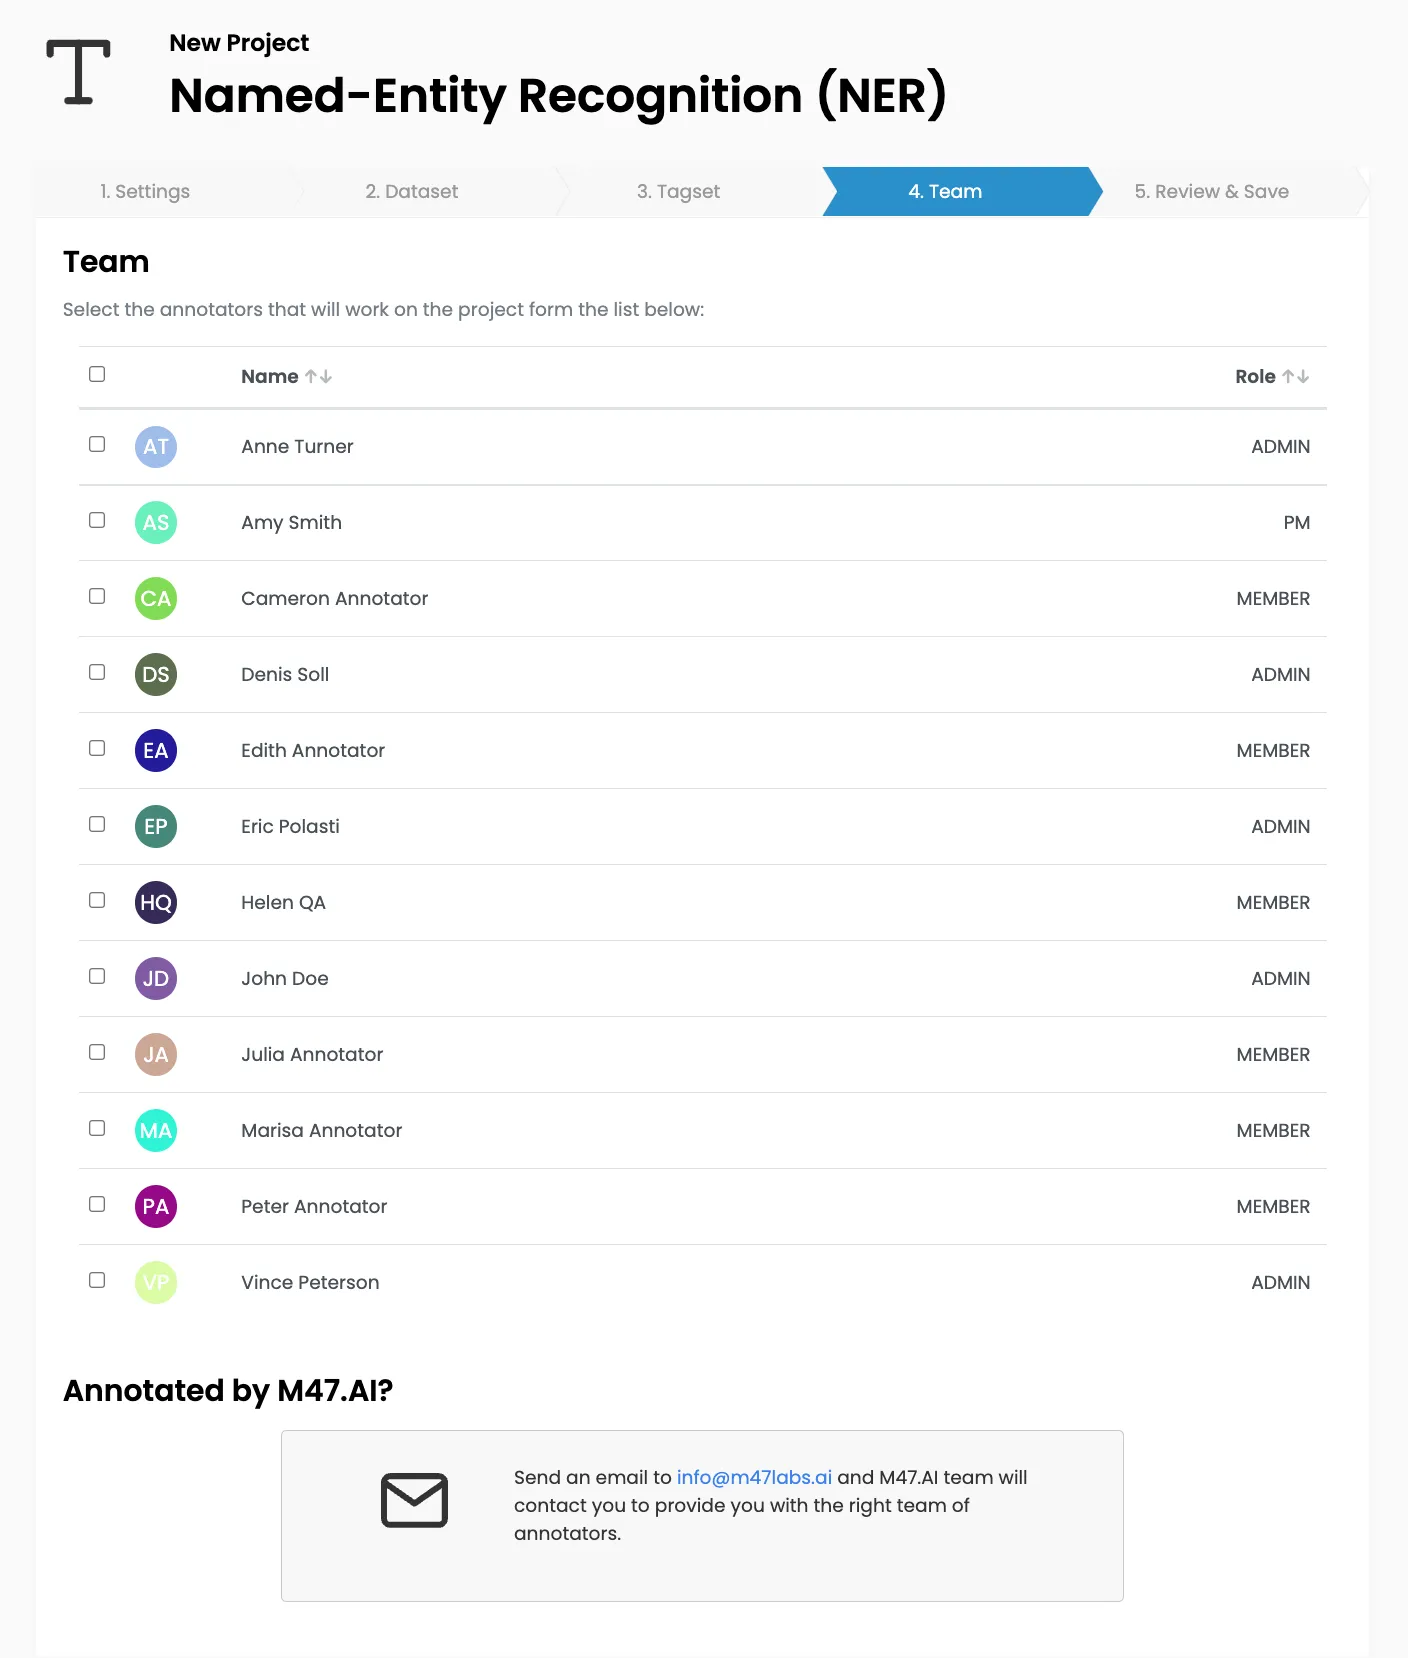
4. Team: you'll have a list of all your team members - choose the annotators who will work on that project. You can also click on the top box to select all members.
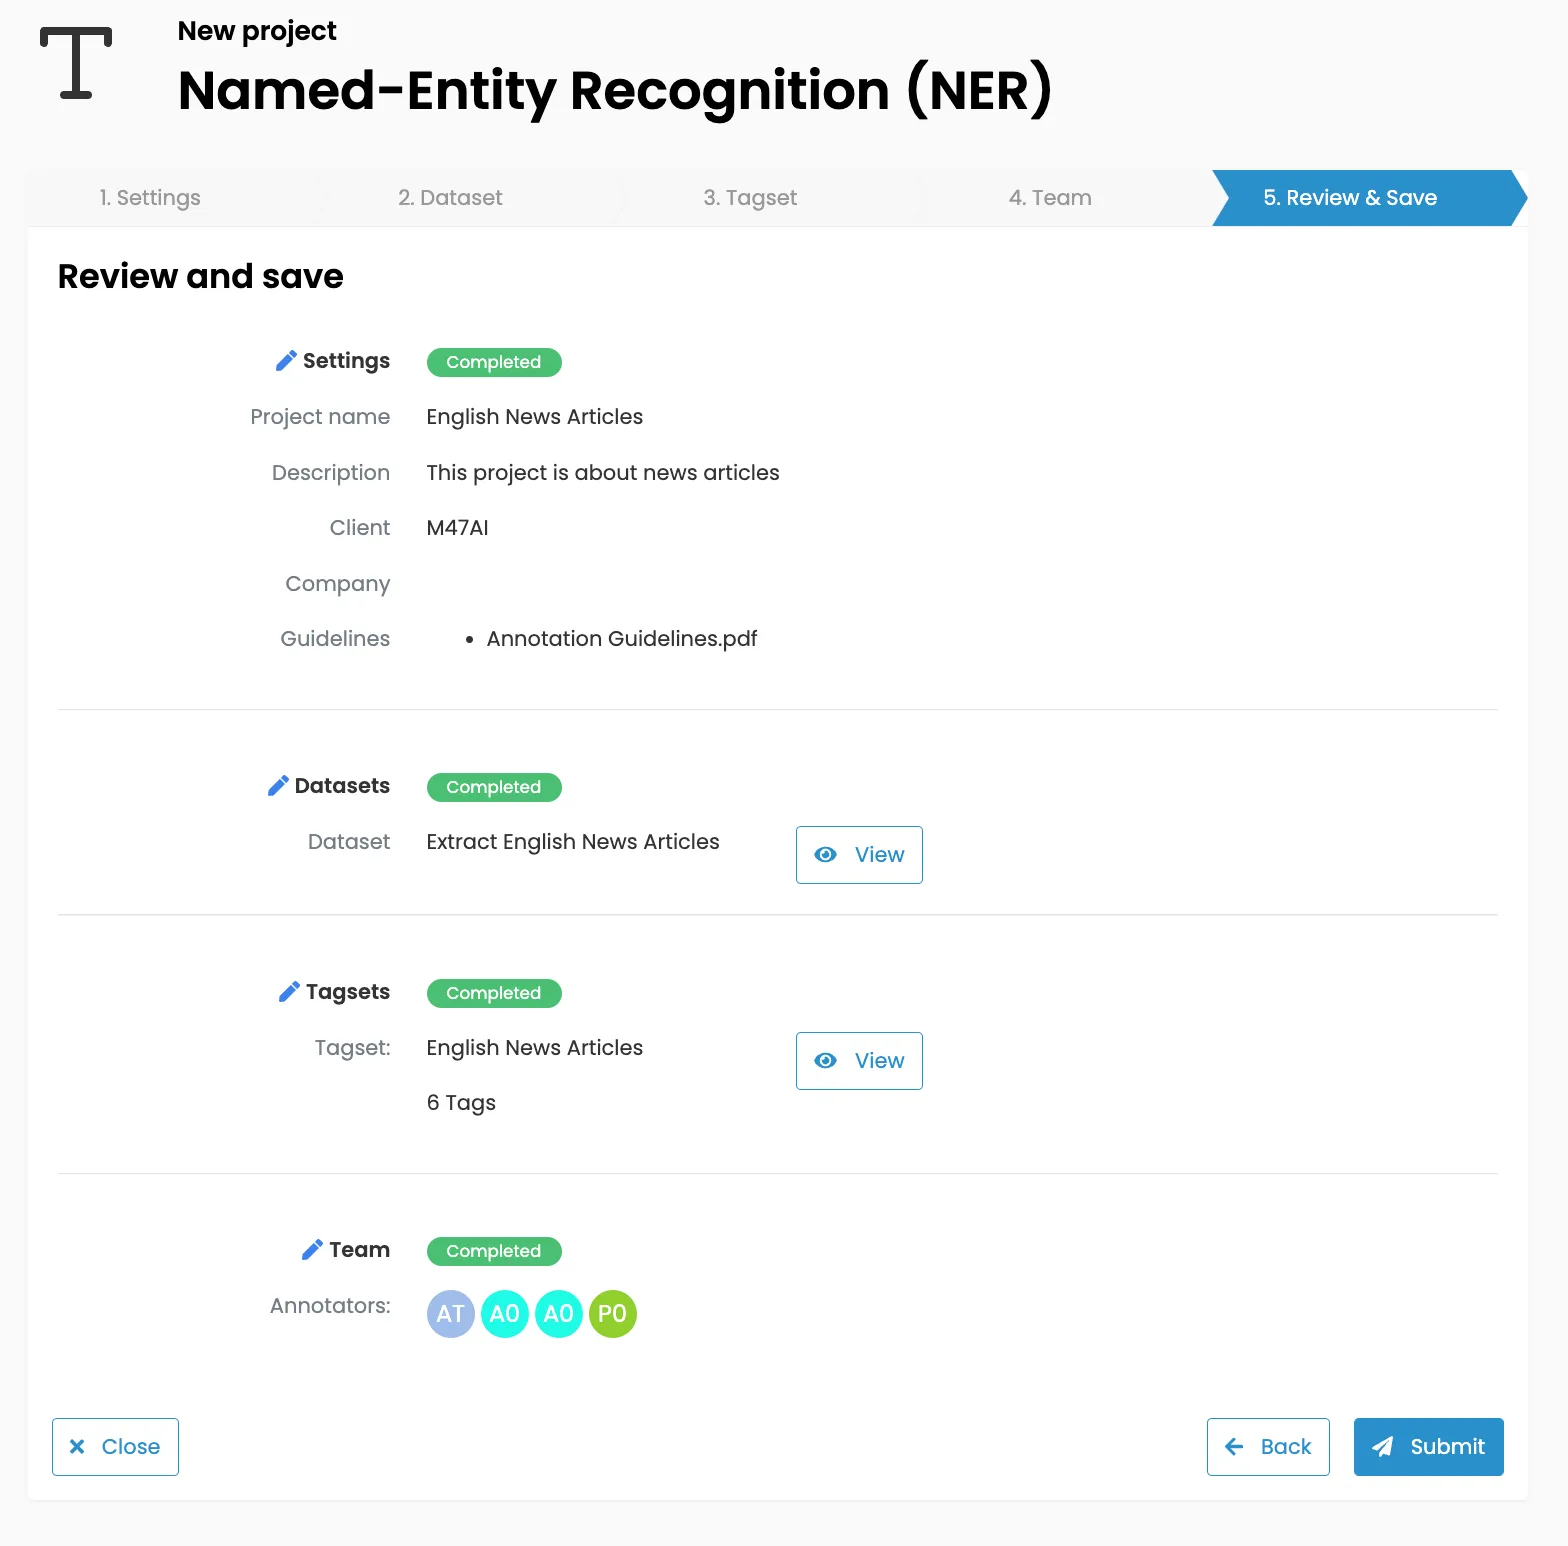
5. Review and save: it's your chance to double-check - make sure every step is completed and change easily anything by clicking on the pen button
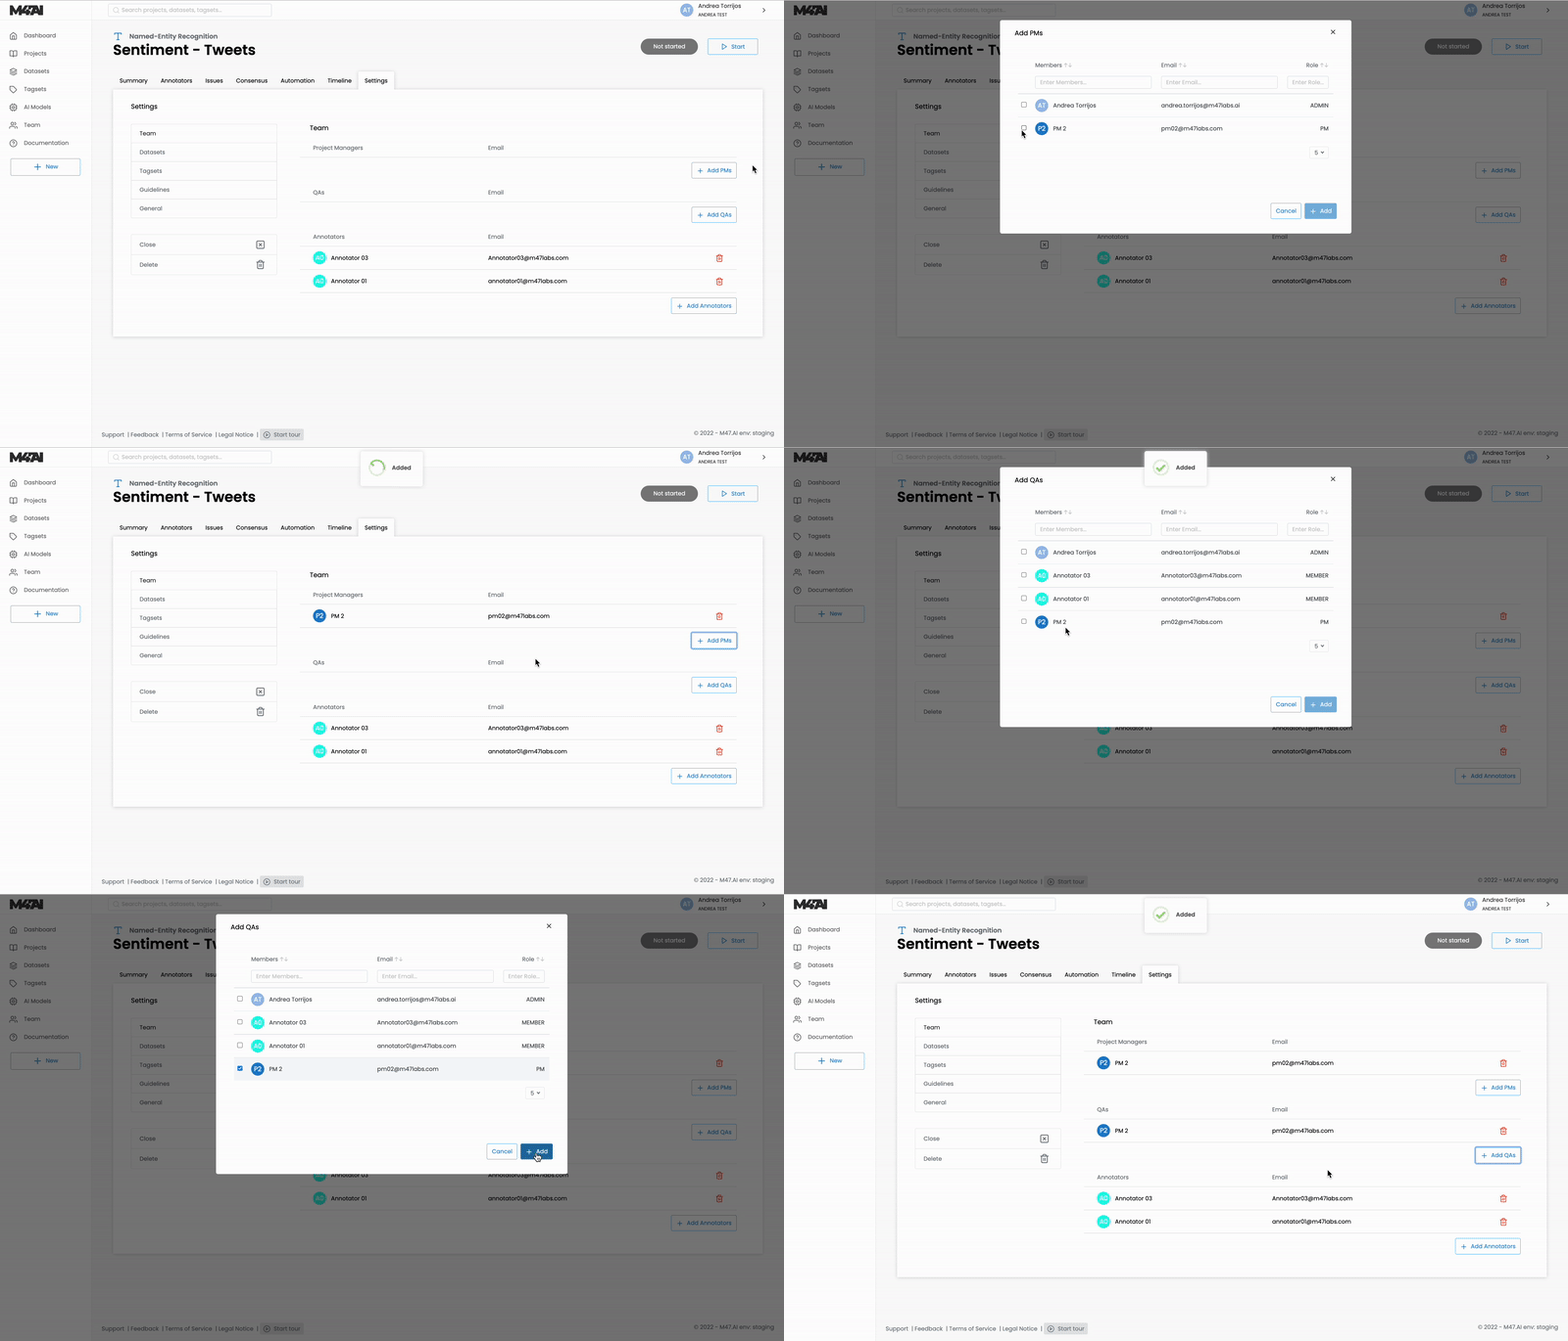
Once it's submitted, you can add PMs and QAs to the project as well as distributing tasks among the annotators.
To assign PMs and QAs, go to the settings tab of the project.
Before starting the project, you can decide if you want every annotator doing the same tasks or if you prefer dividing the tasks among annotators. "Everybody work on all tasks" will be selected by default. If you want to customize the distribution you can either do it by selecting intervals for each annotator or by assigning a specific number of tasks for each.
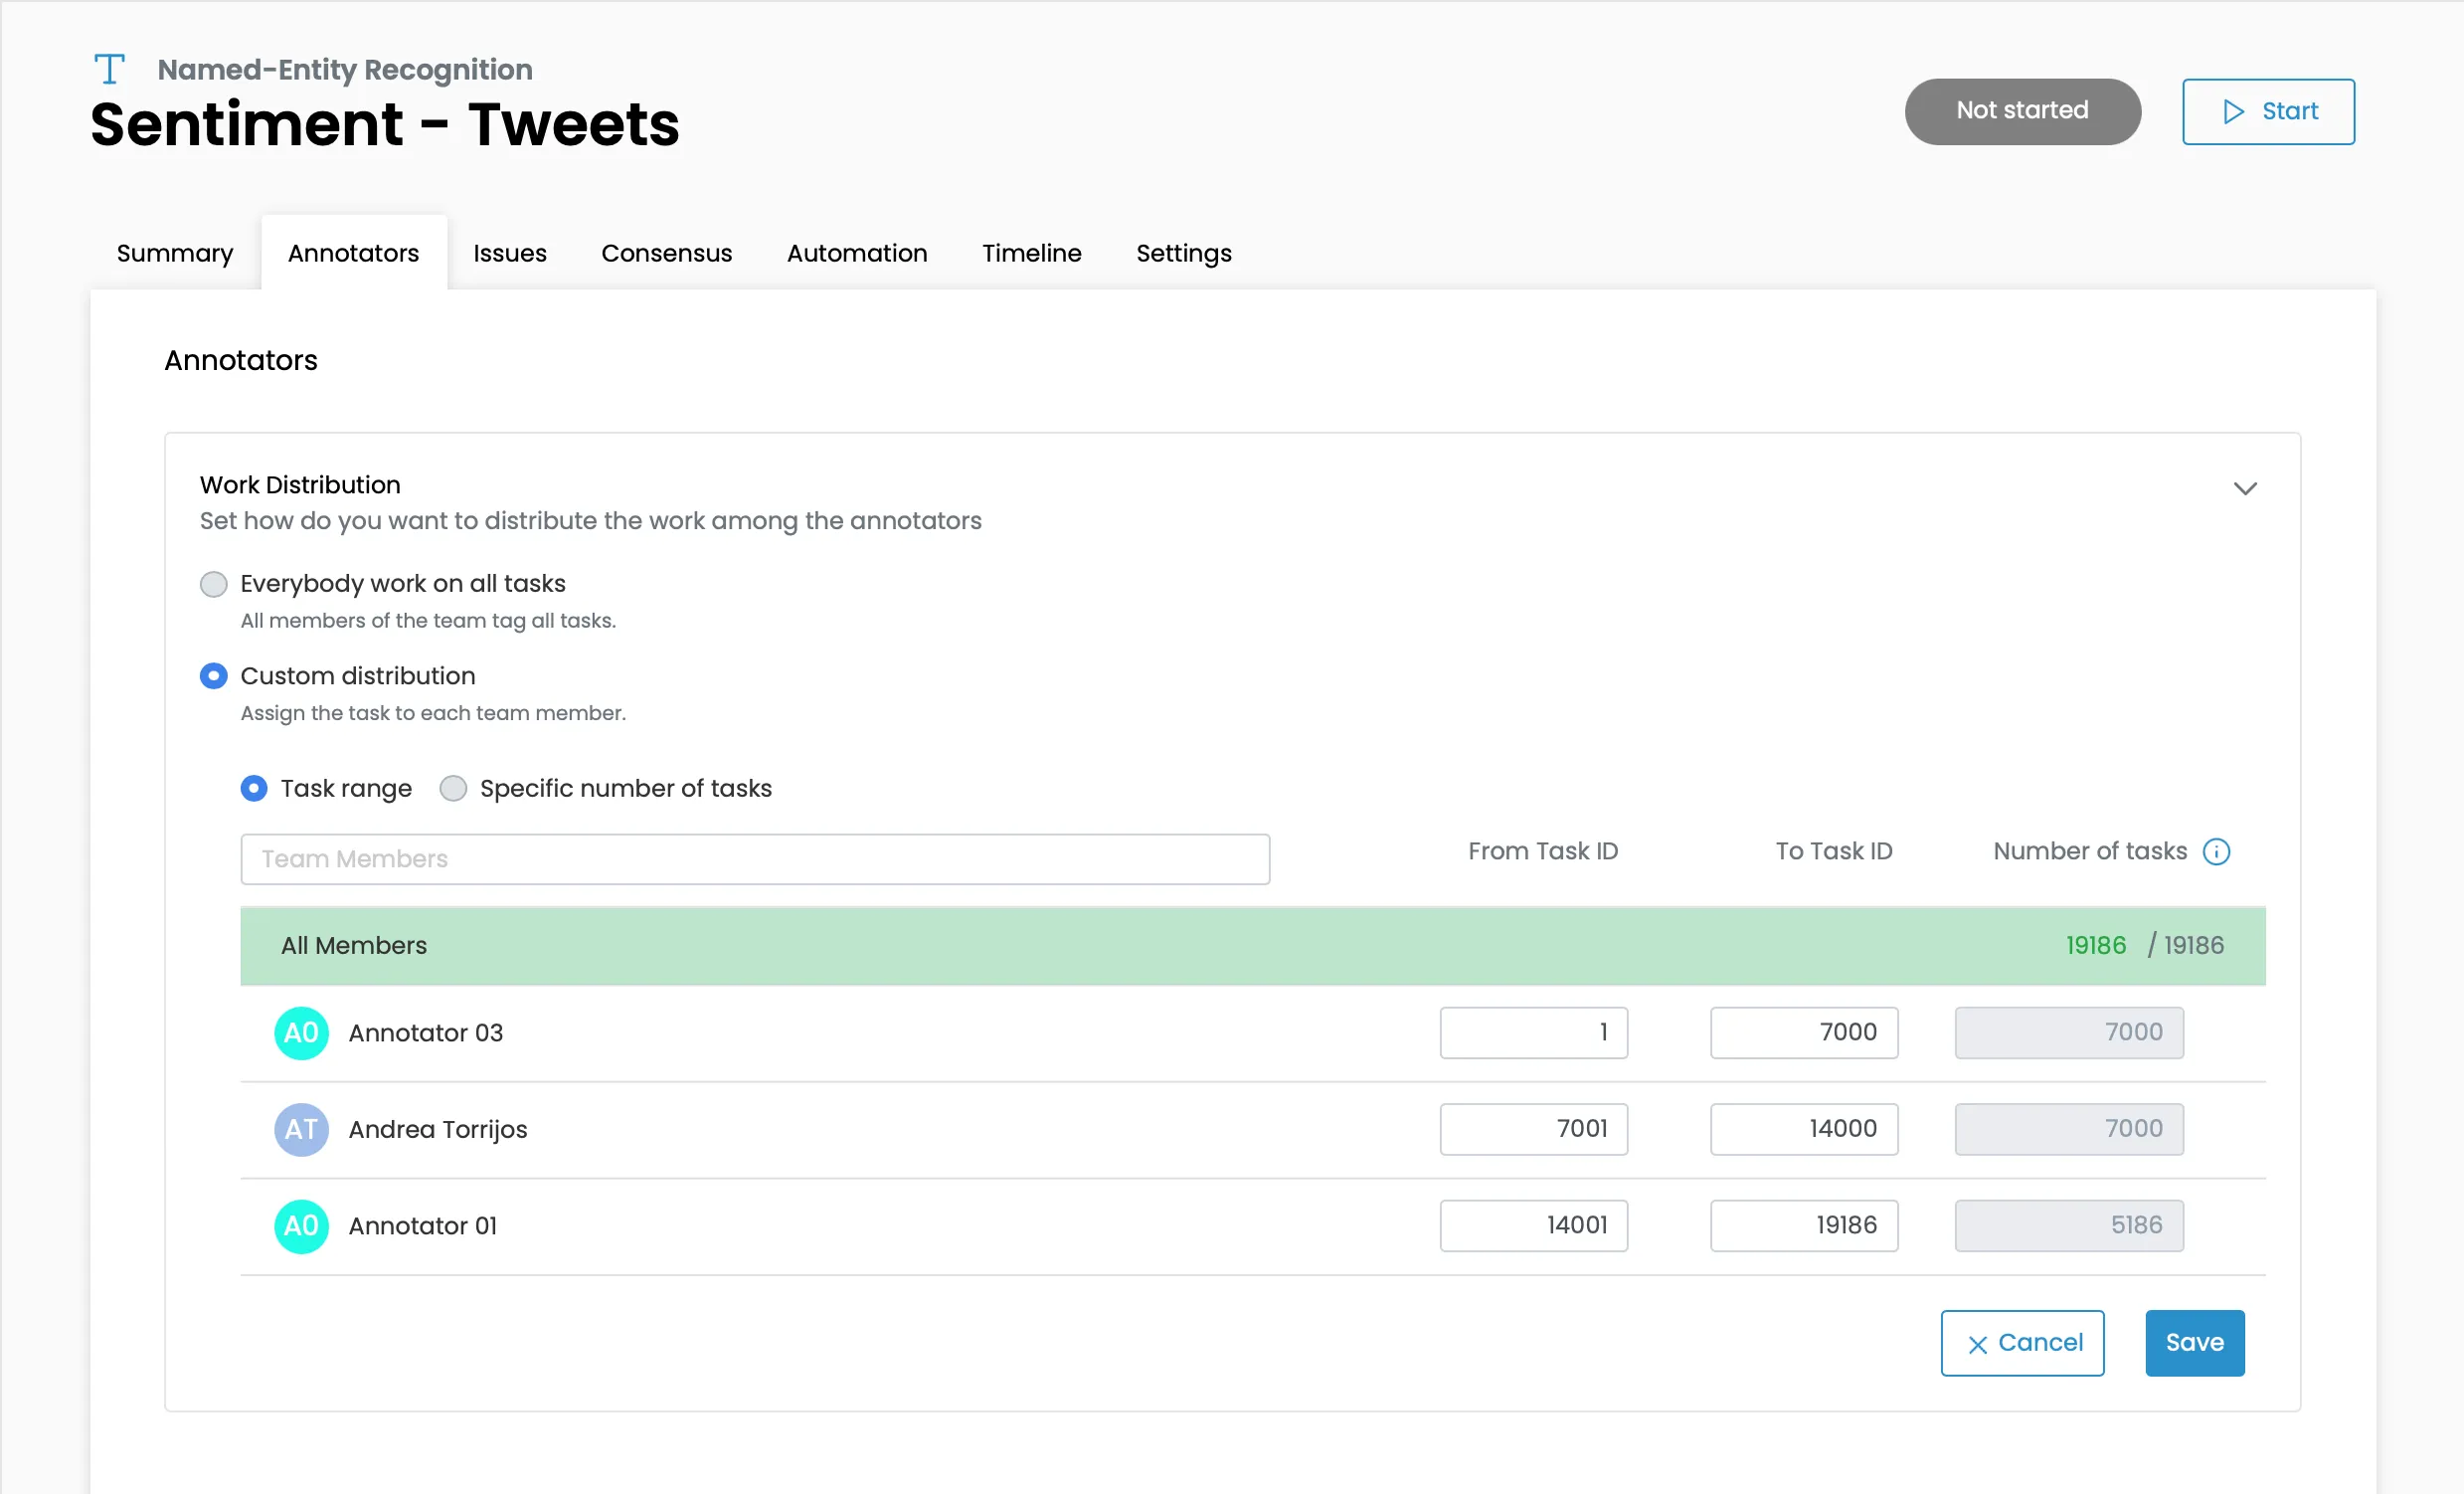
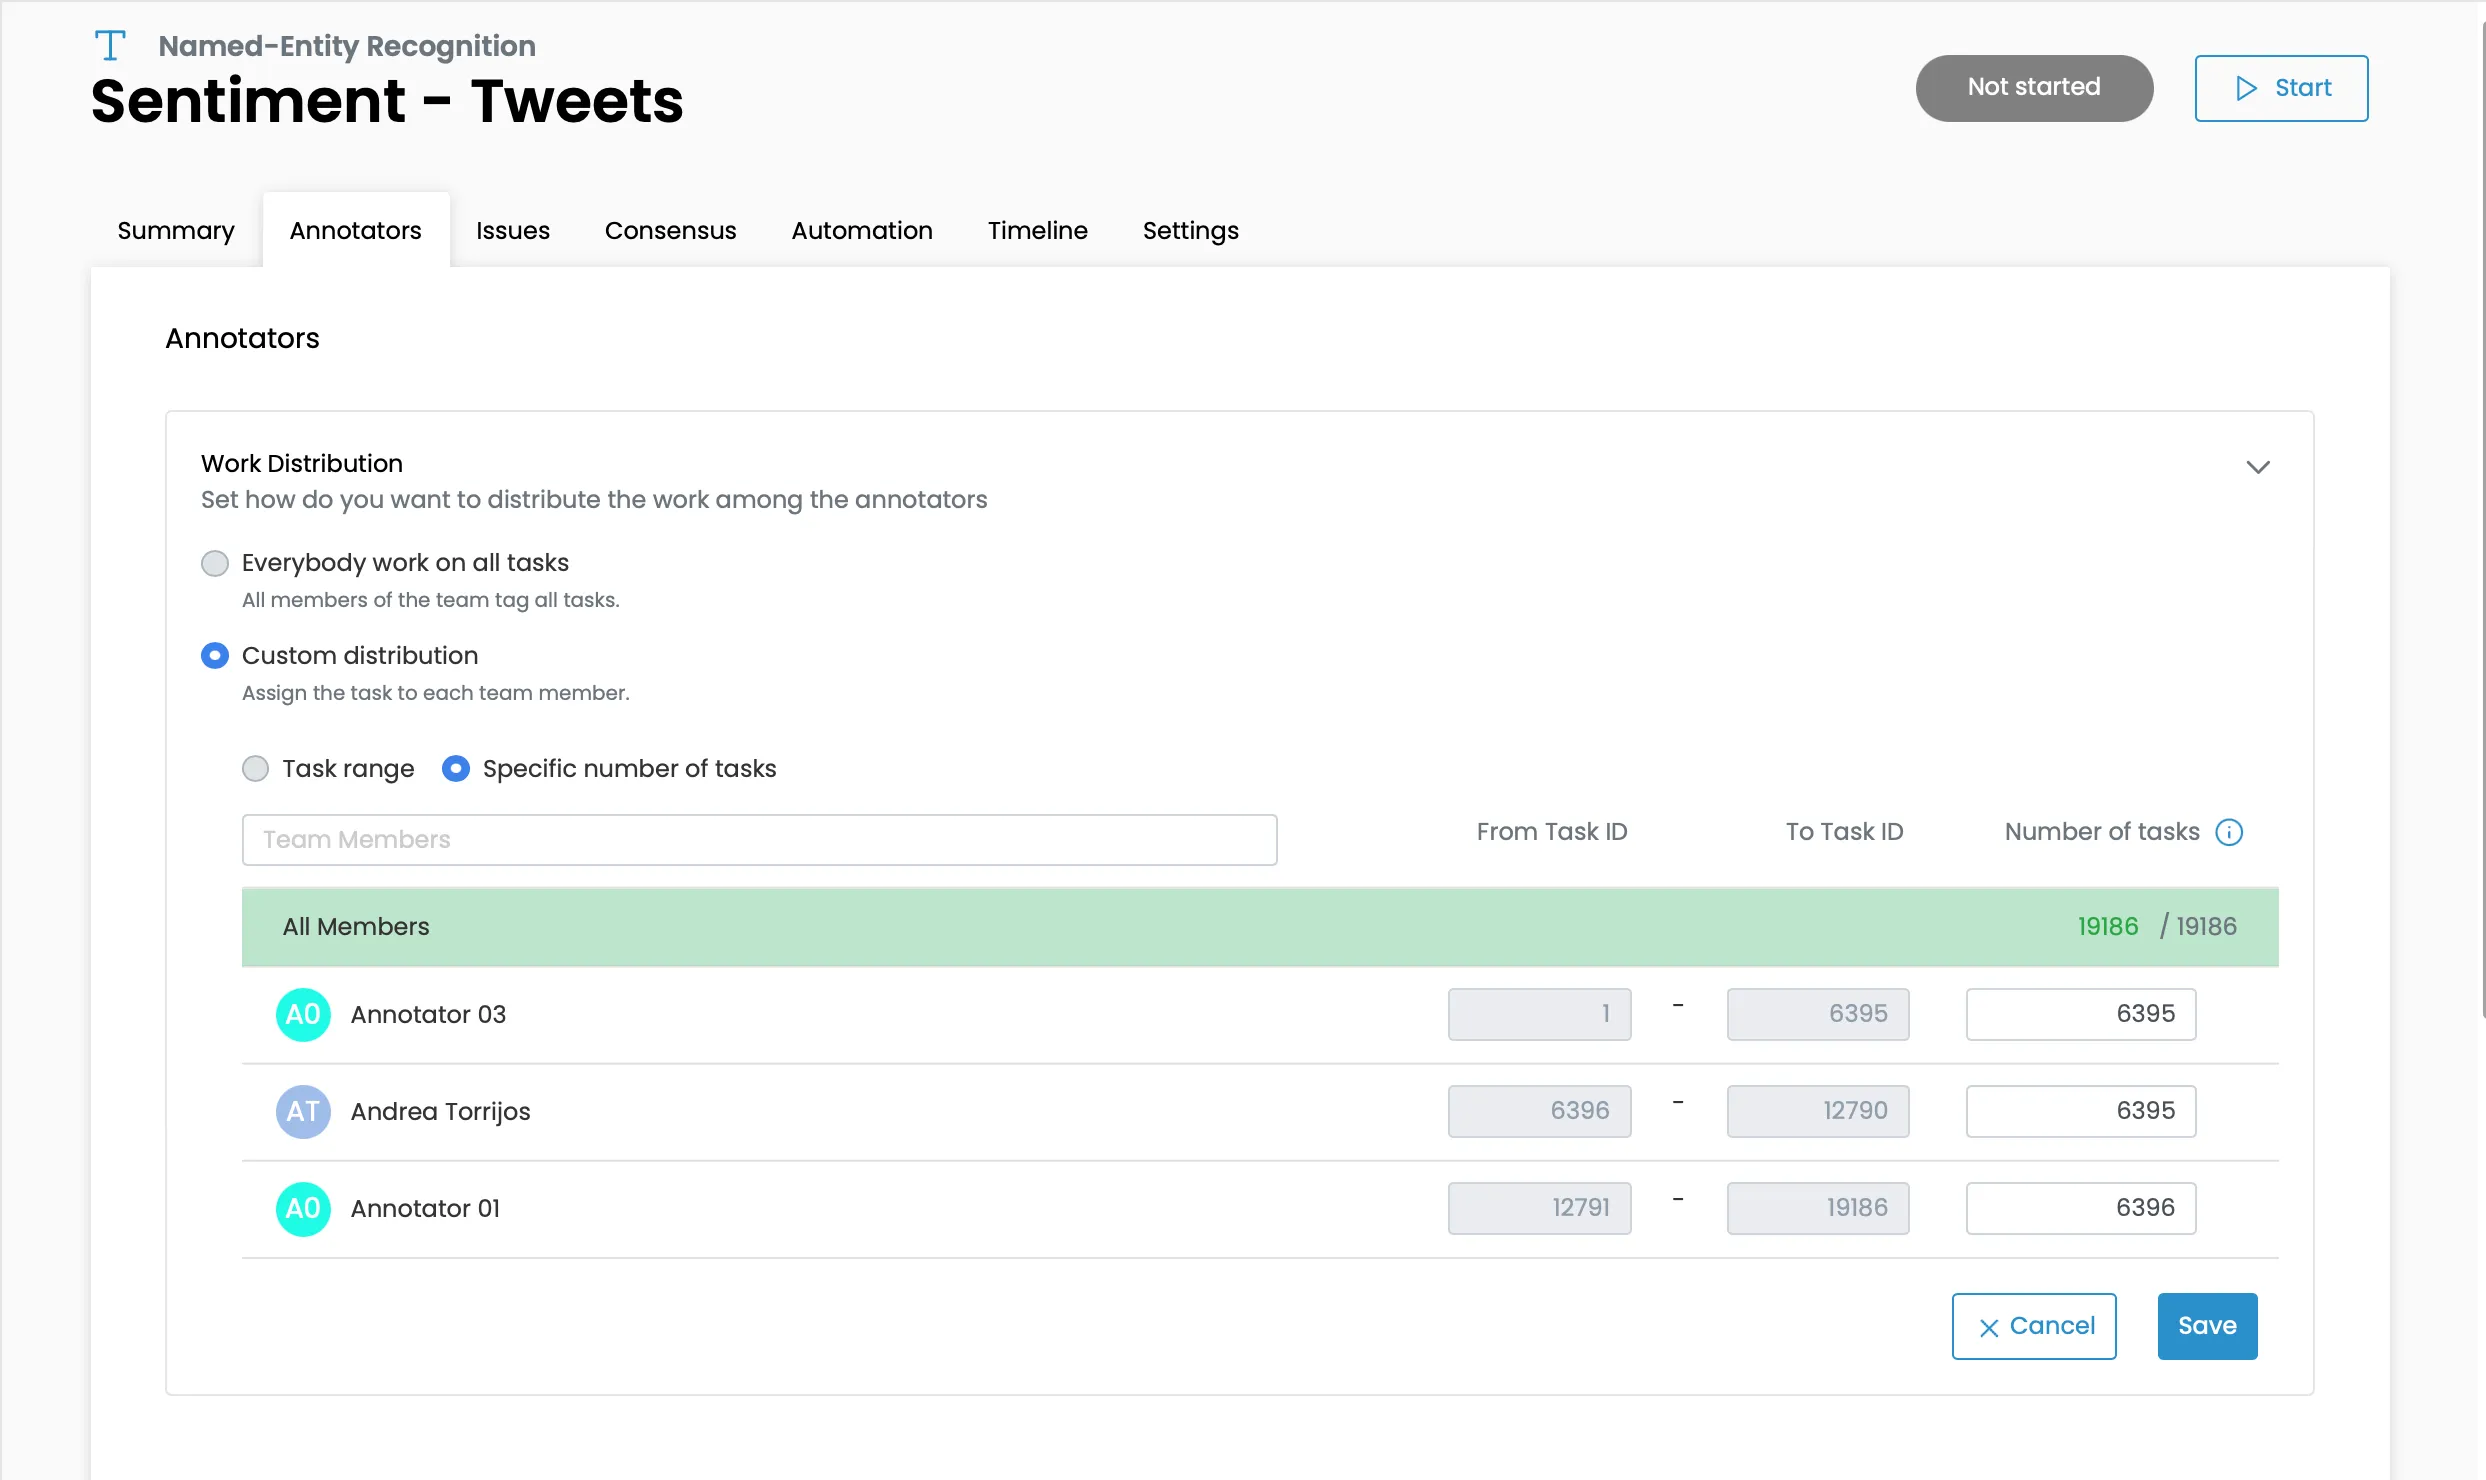
*This can only be done before starting the project, and once it's started it can't be changed.
Finally, once you're happy with all the settings, click on the "Start" button and it will be visible for the annotators and they will be able to start labeling.


